Crochet Pumpkin Coaster Step by Step: Easy Fall Tutorial for Beginners
Learn how to make a cute crochet pumpkin coaster in three rounds, then add a stem and curly vine. A fun fall crochet project for beginners
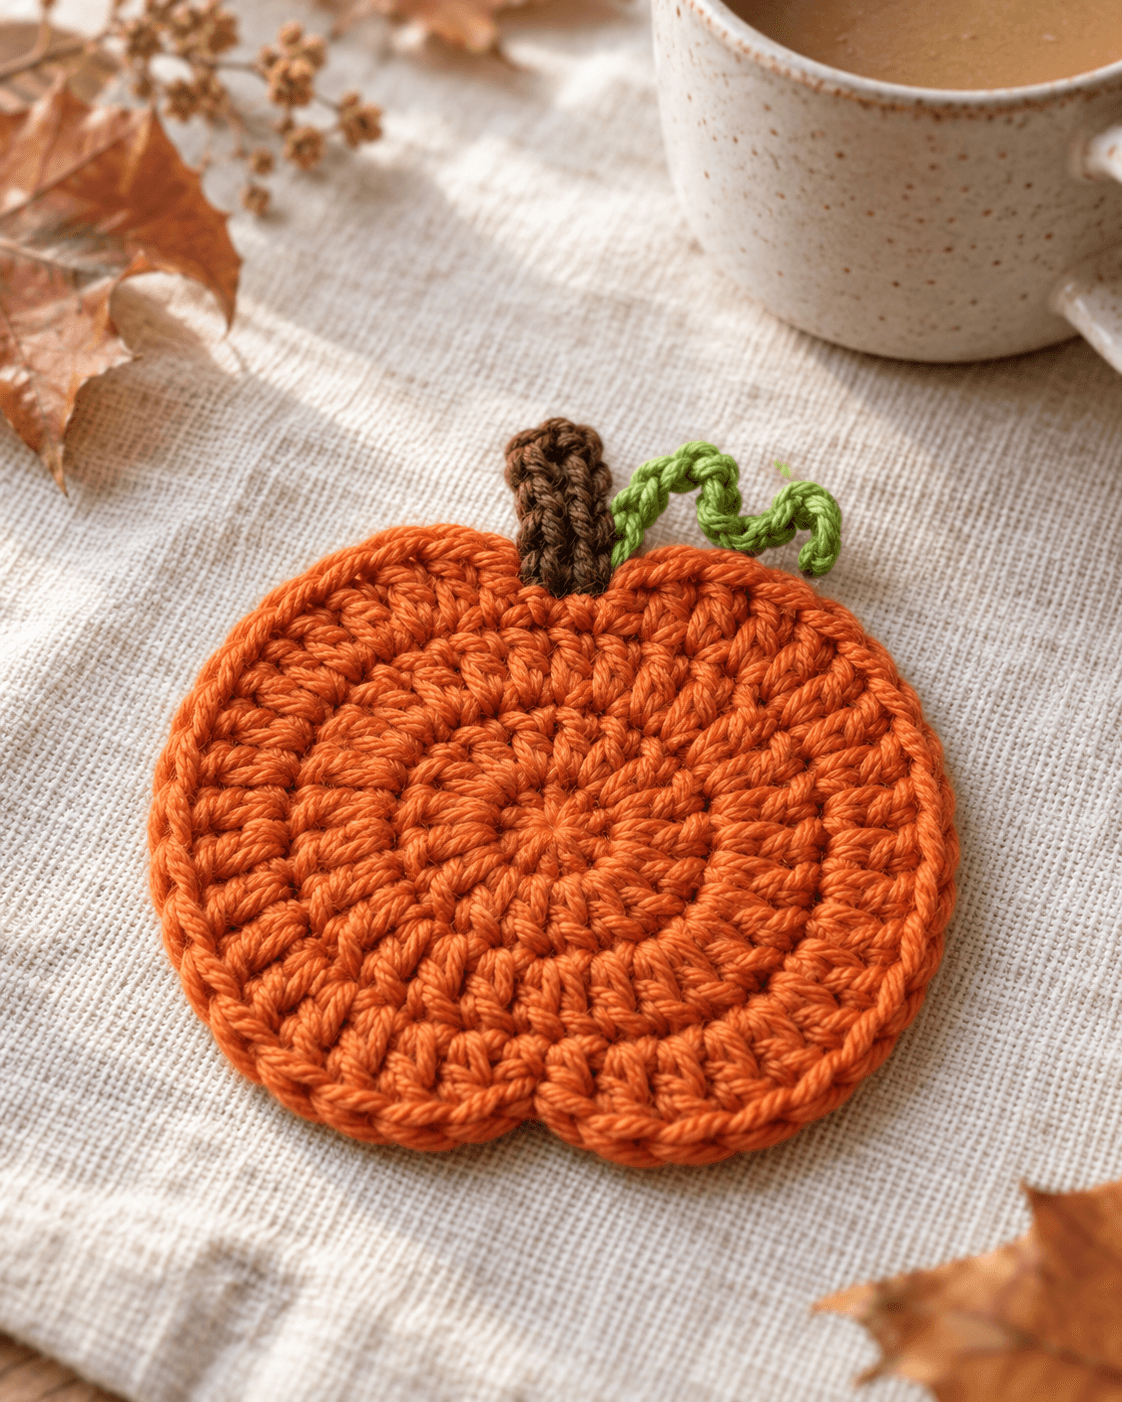
Looking for a quick and adorable fall crochet project? This pumpkin crochet coaster is a lovely way to decorate your coffee table for autumn. The pumpkin body is worked in just three rounds, then finished with a small brown stem and a curly green vine.
Materials You'll Need
- Worsted weight (4) yarn in pumpkin orange, brown and green
- 5 mm (H-8) crochet hook
- Yarn needle
- Scissors
Crochet Abbreviations (US Terms)
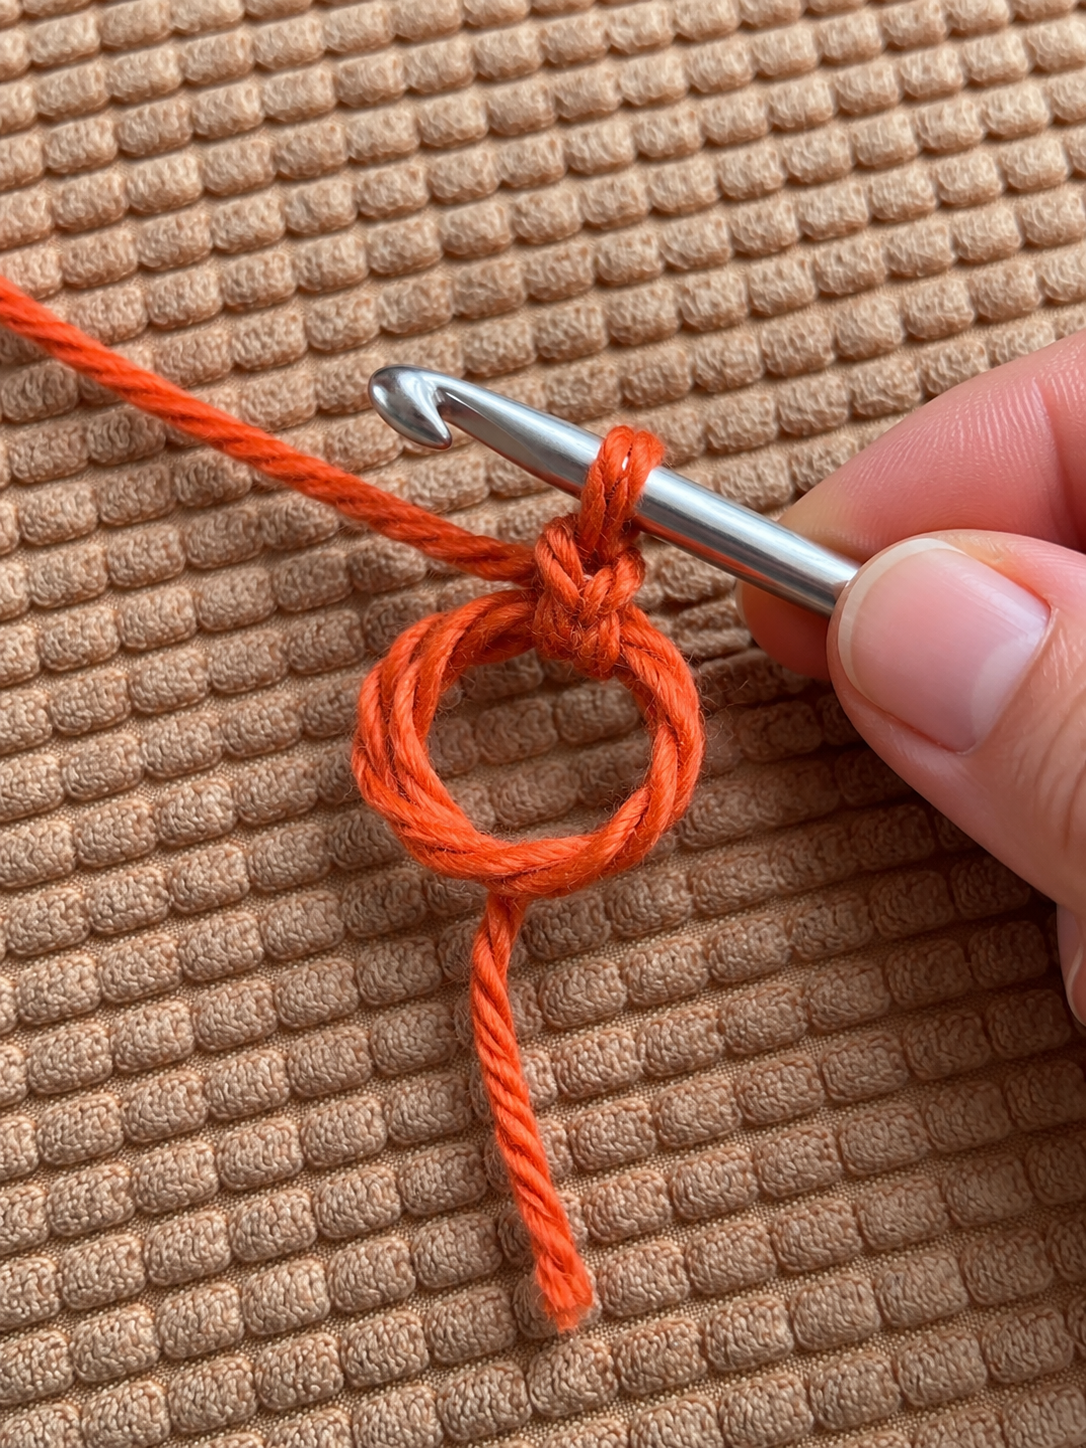
- MR – Magic ring
- ch – Chain
- sl st – Slip stitch
- sc – Single crochet
- hdc – Half double crochet
- dc – Double crochet
- st – Stitch
Crochet Pumpkin Coaster Step by Step
Step 1: Make the Magic Ring
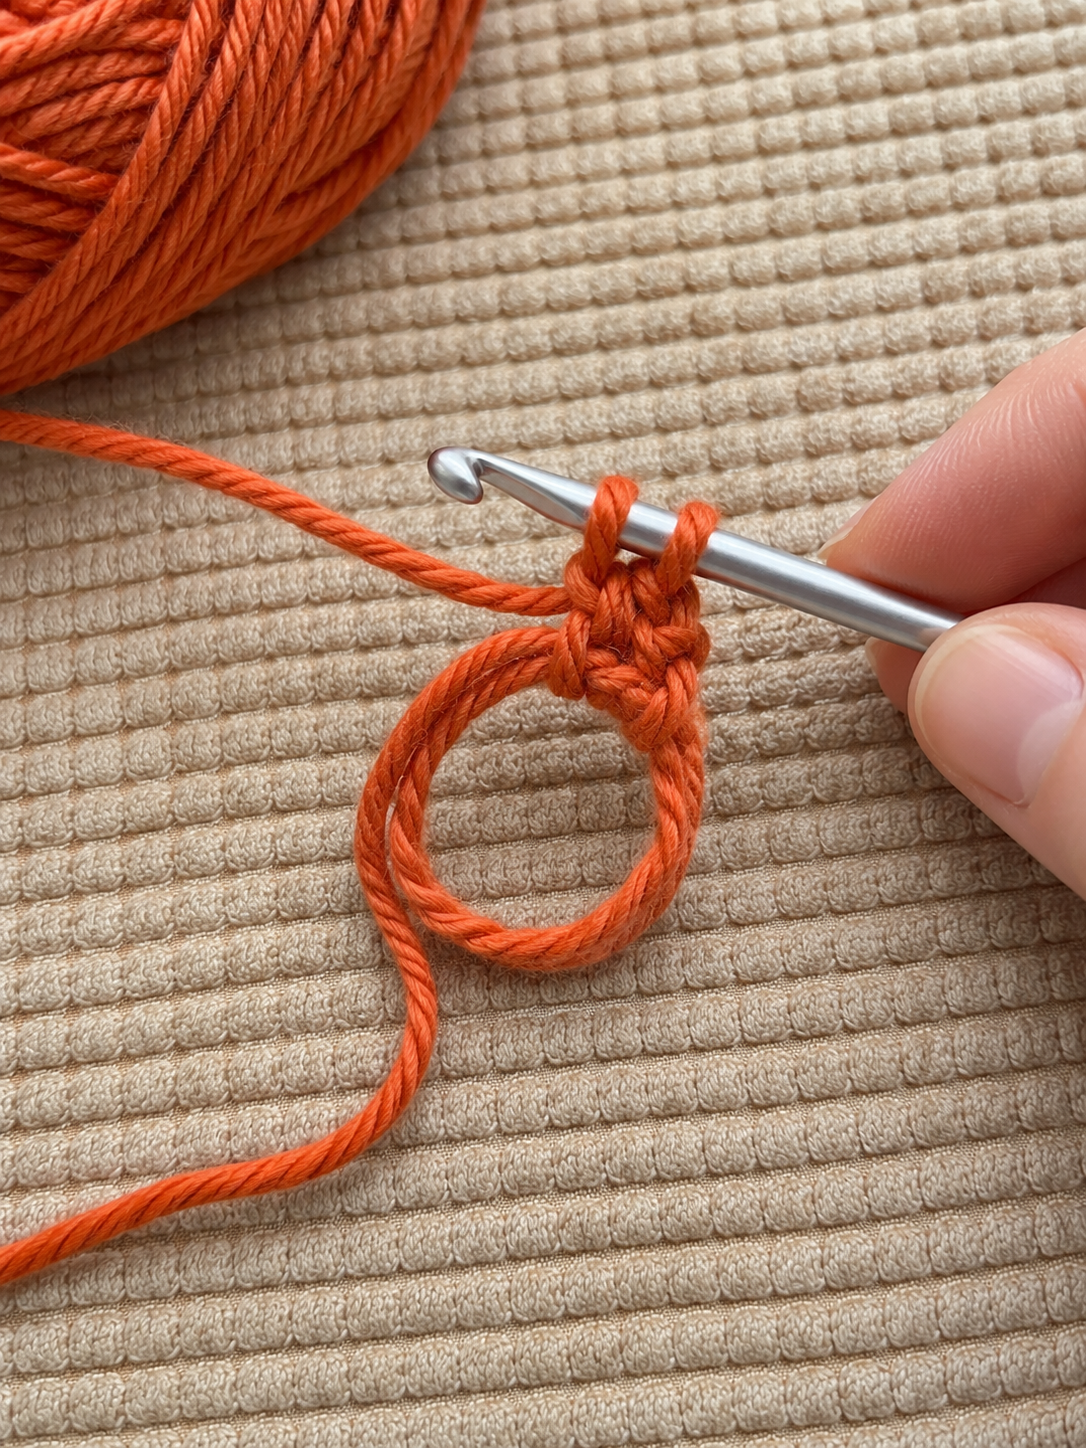
Start with your orange yarn and create a magic ring. Chain two to prepare for the first round.
Step 2: Crochet the First Round
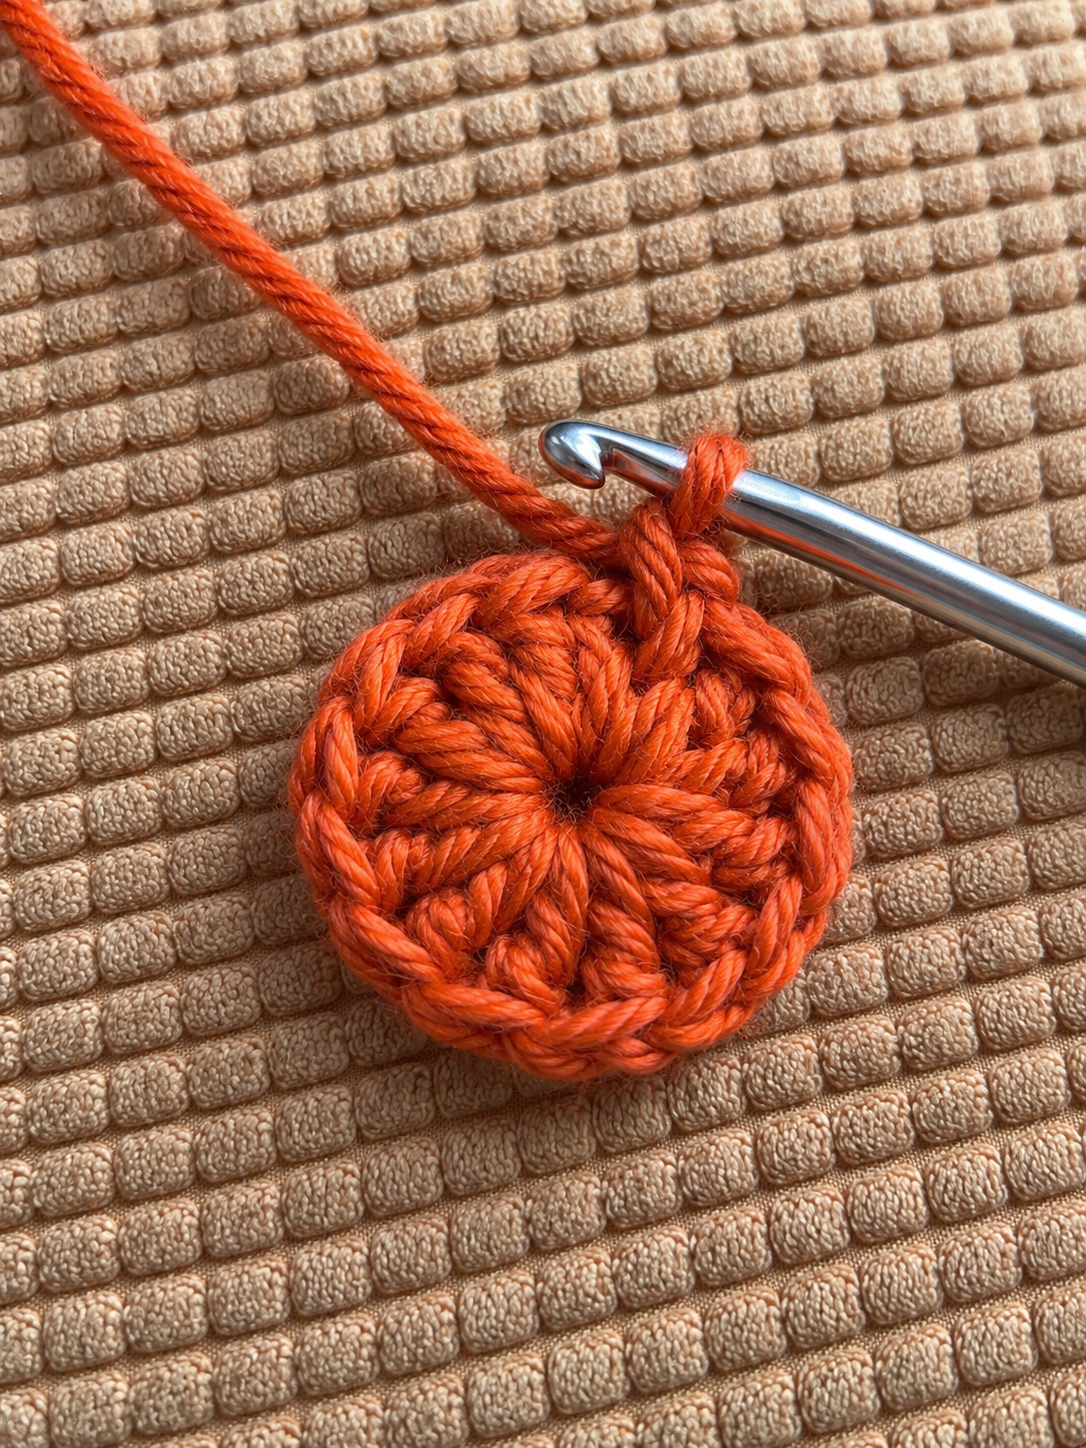
Work 16 double crochet stitches into the magic ring. Pull the center closed and join the round with a slip stitch.
You should now have 16 double crochet stitches.
Step 3: Increase the Second Round
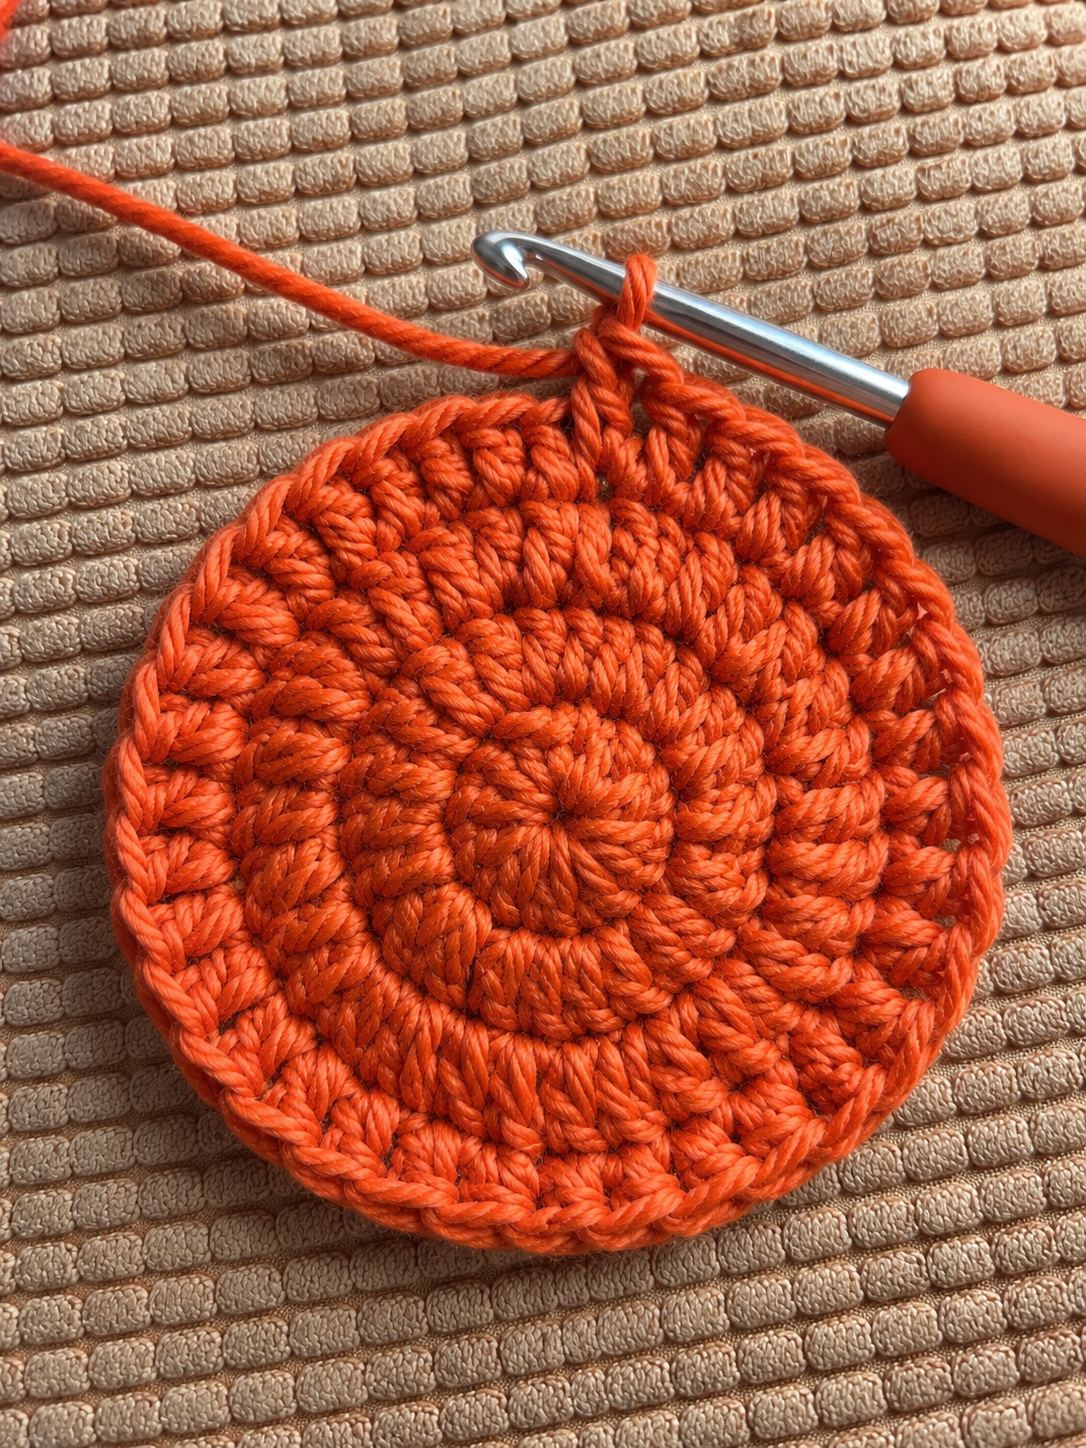
Chain two. Work two double crochet stitches into each stitch around, then join the round.
At the end of this round, you will have 32 double crochet stitches.
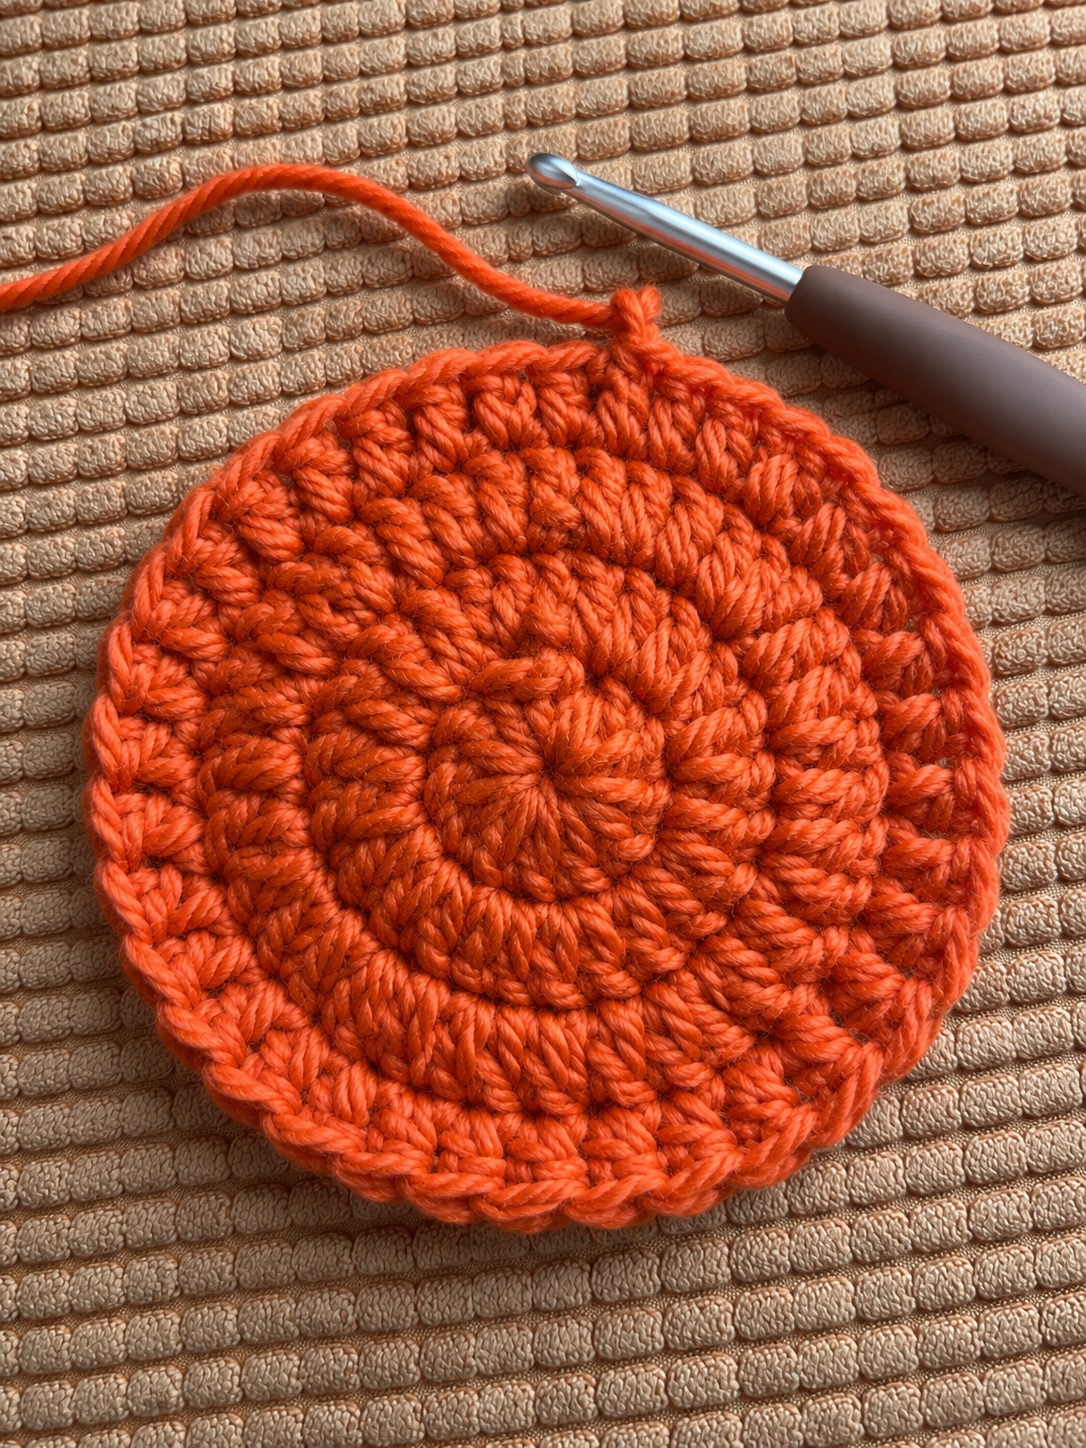
Step 4: Shape the Pumpkin
Chain two. Begin the shaping round by alternating an increase (two double crochets in one stitch) with one regular double crochet, repeating that sequence six times.
Step 5: Create the Pumpkin Indents
Continue shaping the edge with:
- Two half double crochets in the next stitch
- One single crochet in each of the next two stitches
- Two half double crochets in the following stitch
- One double crochet in the next stitch
Repeat the earlier double-crochet increase sequence six more times. Finish with a single crochet in each of the final three stitches.
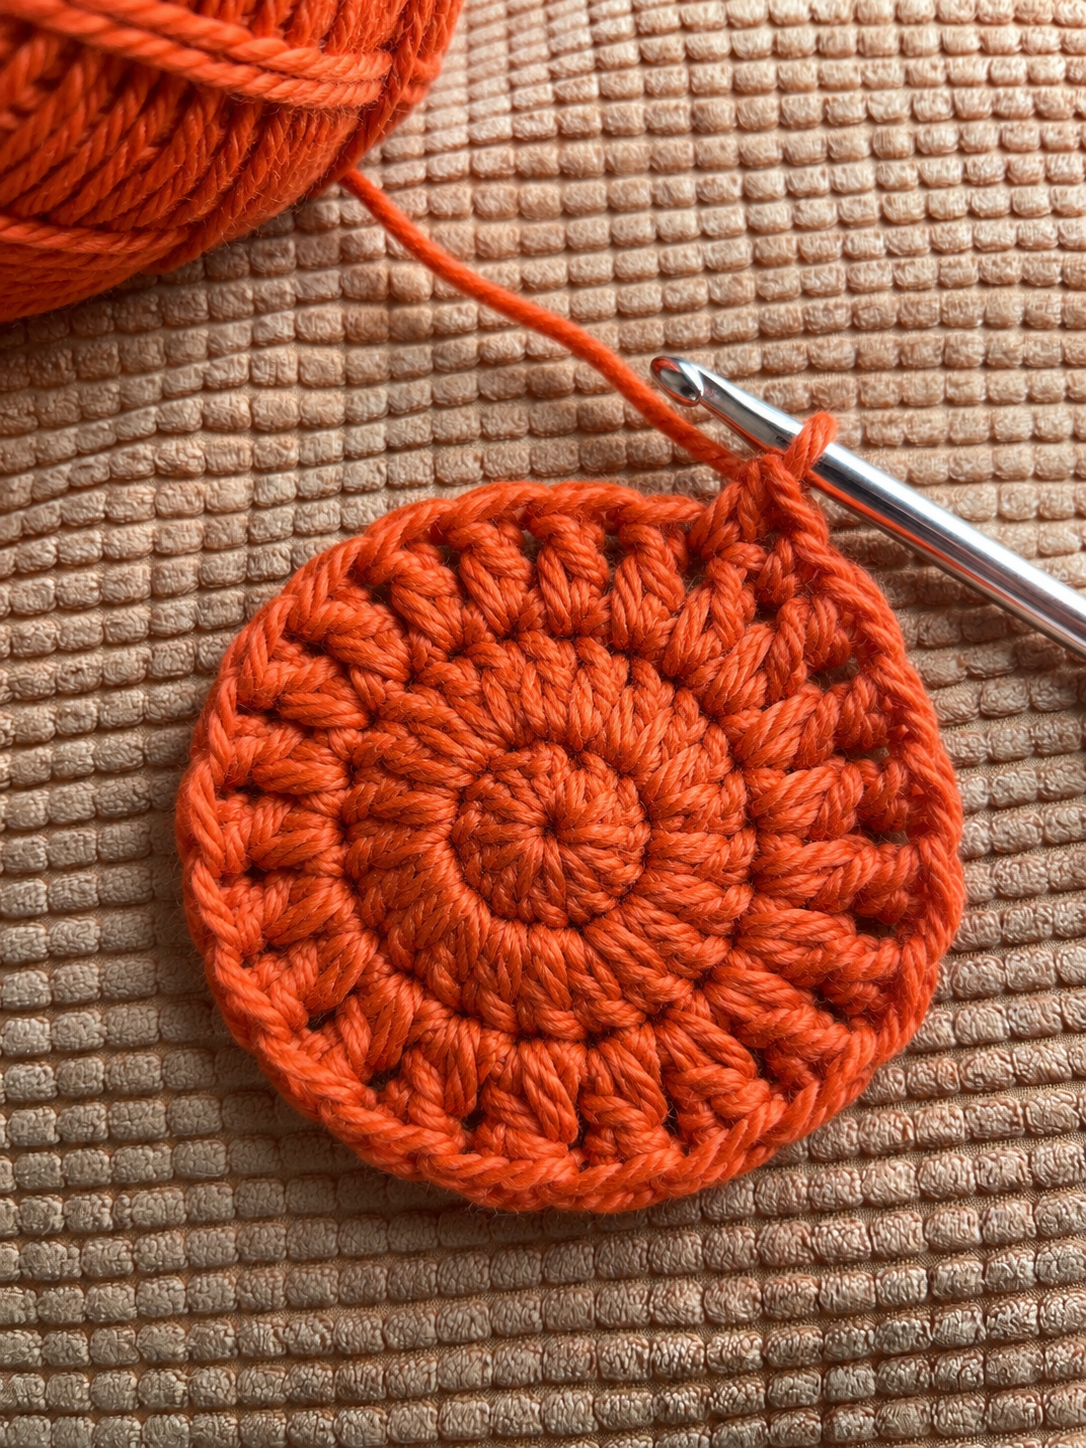
Join, fasten off and weave in the ends.
Step 6: Add the Stem and Curly Vine
Using brown yarn, join at the three single crochet stitches along the top of your pumpkin.
Chain two, work one double crochet into each of those three stitches, then chain two and secure the stem.
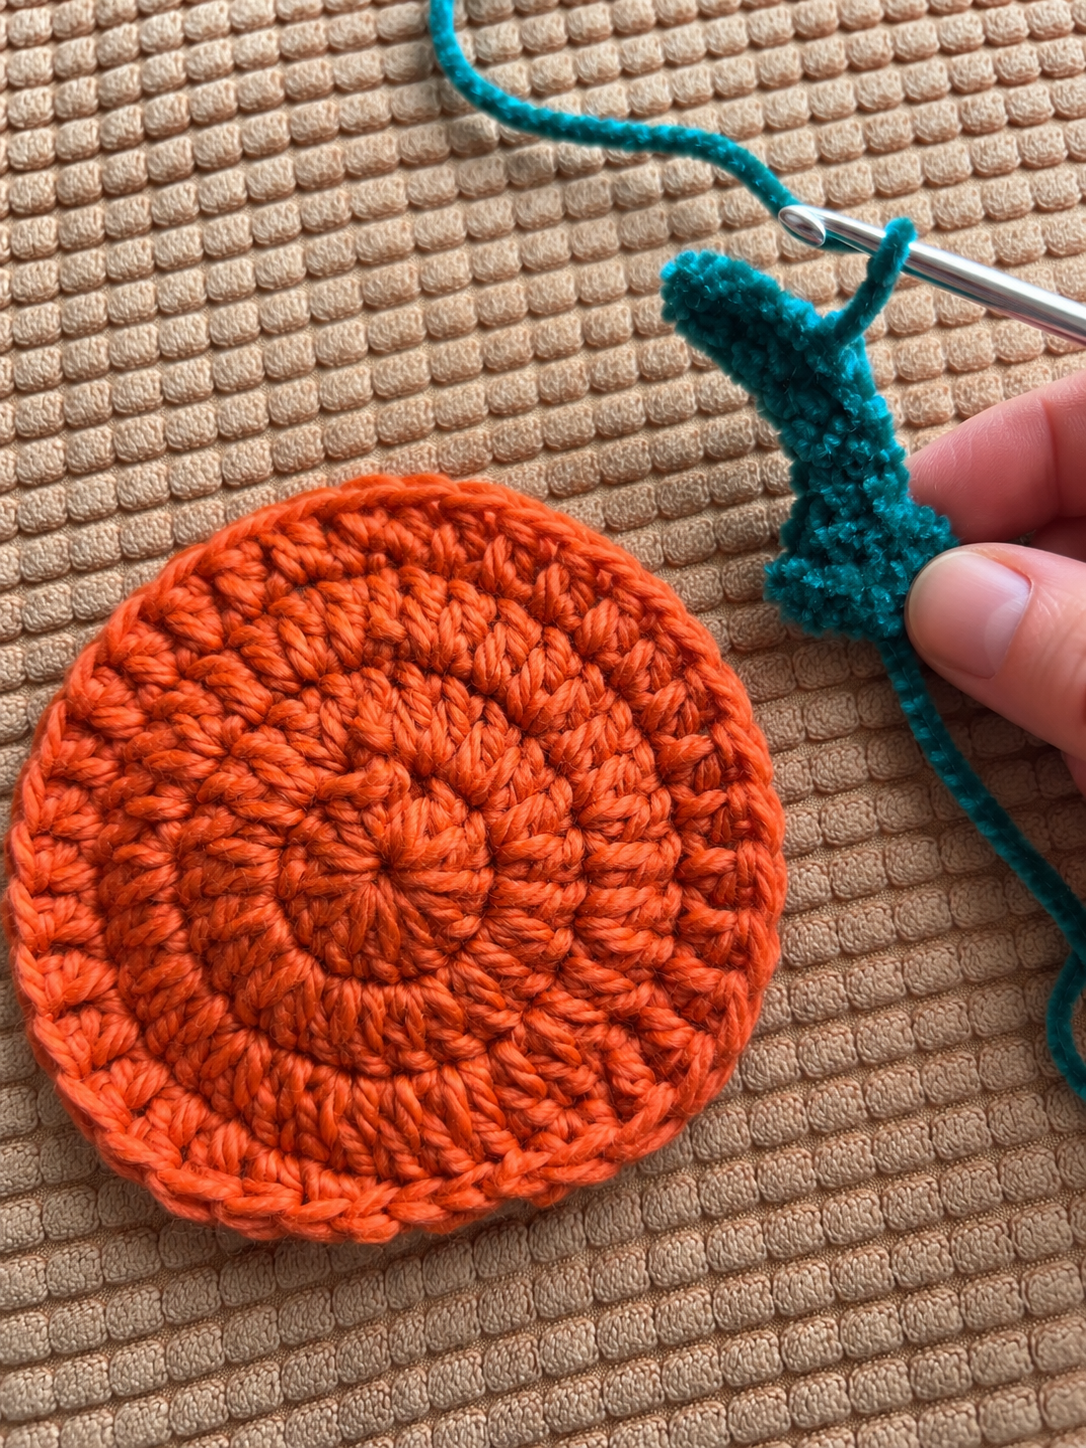
For the green vine, chain ten. Starting in the second chain from the hook, work two single crochets into each chain. The extra stitches create a natural curl.
Fasten off and attach the vine beside the brown stem.
Step 7: Finish Your Pumpkin Coaster
Weave in any remaining yarn ends and gently flatten the coaster.
Your crochet pumpkin is ready to decorate a fall table or sit beneath your favorite coffee mug!
Tips for Beginners
- Use a stitch marker if you find it difficult to identify the beginning of each round.
- Keep your tension consistent to help the coaster lie flat.
- Choose a shorter or longer starting chain to adjust the length of the green vine.
- Cotton yarn is another option for a coaster, although it may change the finished size.
Crochet Pumpkin Coaster Step by Step: Easy Fall Tutorial for Beginners
- Skill level
- Beginner
- Yarn
- Worsted weight (4) yarn in orange, brown and green
- Hook
- 5 mm (H-8)
- Gauge
- Not essential; finished size varies with tension
- Finished size
- Small coaster suitable for a standard mug
- Time
- 30–60 minutes
Materials
- Orange worsted weight (4) yarn
- Brown worsted weight (4) yarn
- Green worsted weight (4) yarn
- 5 mm (H-8) crochet hook
- Yarn needle
- Scissors
- Stitch marker (optional)
Abbreviations (US terms)
- MR
- magic ring
- ch
- chain
- sl st
- slip stitch
- sc
- single crochet
- hdc
- half double crochet
- dc
- double crochet
- st
- stitch
Instructions
Notes: Use US crochet terms. The starting ch 2 does not count as a stitch.
Rnd 1: With orange yarn, make a magic ring (MR). Ch 2, work 16 dc into the ring. Pull the ring closed and join with a sl st to the first dc. (16 sts)
Rnd 2: Ch 2, work 2 dc in each stitch around. Join with a sl st to the first dc. (32 sts)
Rnd 3: Ch 2, repeat [2 dc in next st, 1 dc in next st] 6 times. Work 2 hdc in next st, 1 sc in each of the next 2 sts, 2 hdc in next st, and 1 dc in next st. Repeat [2 dc in next st, 1 dc in next st] 6 times. Work 1 sc in each of the last 3 sts. Join with a sl st, fasten off and weave in ends. (46 sts)
Stem: With brown yarn, join to the first of the final 3 sc stitches from Round 3. Ch 2, work 1 dc in each of these 3 stitches, ch 2 and secure the stem. Fasten off and weave in ends.
Curly Vine: With green yarn, ch 10. Starting in the second chain from the hook, work 2 sc in each chain across. (18 sts) The vine will curl naturally. Fasten off and attach it beside the brown stem.
Finishing: Weave in all remaining ends and gently flatten the pumpkin coaster.
© 2026 Henouda · www.crochethenouda.com. You may sell items you make from this pattern; please credit Crochet Henouda. Do not copy, share or sell the pattern itself.
Frequently asked questions
Is this crochet pumpkin coaster beginner-friendly?
Yes. It uses basic crochet stitches and only three rounds for the pumpkin body.
Can I use cotton yarn?
Yes. Worsted weight cotton is a useful alternative for coasters, but the finished size may vary.
How do I make the green vine longer?
Start with a longer chain, then work two single crochets into each chain to create the curl.
Do I need to check my gauge?
An exact gauge is not essential for this decorative coaster.